
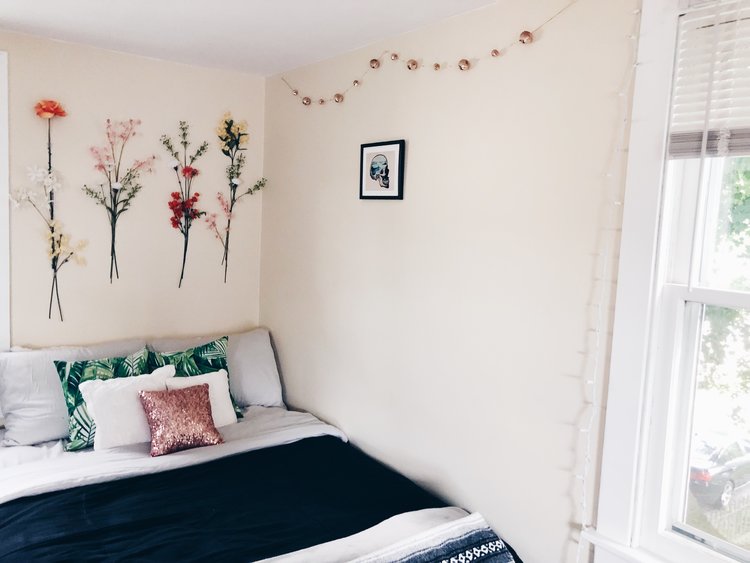
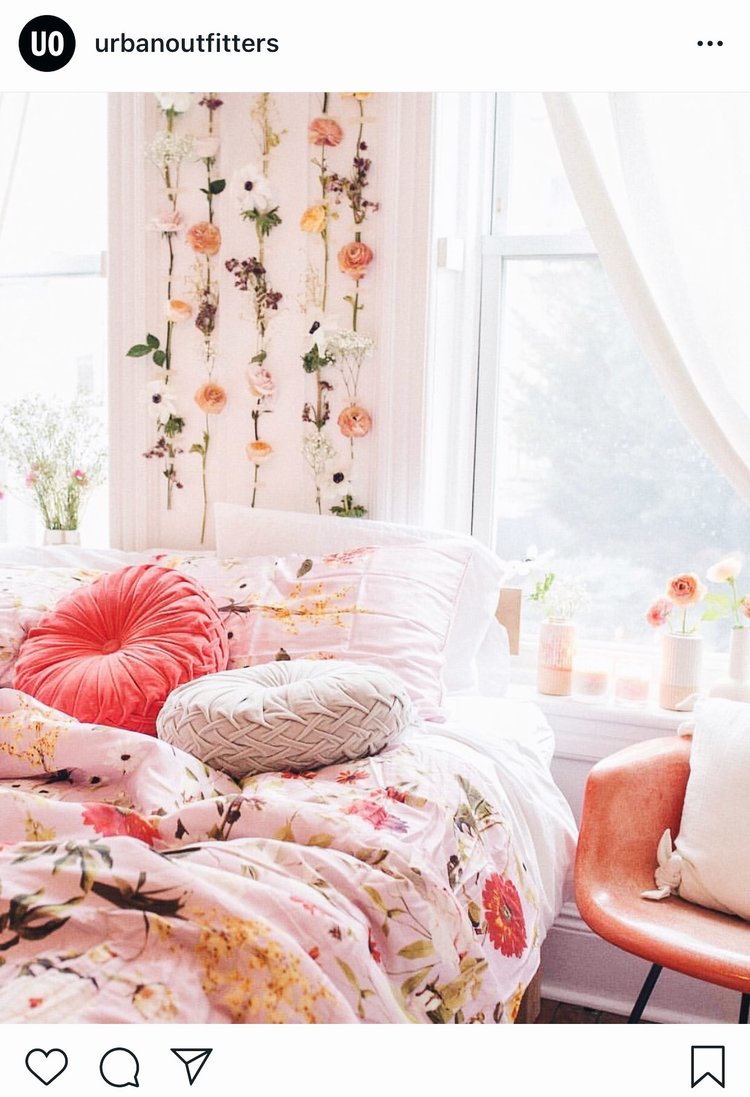
As you may remember from my ‘Hey, MTV, Welcome to My Crib’ post, my room is my absolute favorite space, and I’m constantly looking for ways to add to it while maintaining my signature minimalist-yet-cozy vibe. A few months ago, I was scrolling on Instagram and saw this picture posted by Urban Outfitters, and I simply had to do it. Sunday is my favorite day to be productive, so while running errands, I decided today was the day to bring this idea to life!
I made my way over to Michael’s, and honestly, I did not quite know where to start. I’ve always known about their infamous flower section, but never spent much time actually purchasing from it. Let me just say… fake flowers are EXPENSIVE! I’m sure there are probably more money-savvy ways to go about this project, but Michael’s was right next to Target, and I figured I would just bite the bullet and do it for the sake of time and convenience.
For this type of project, I highly recommend buying more than you think you will need. Worse comes to worse, you can always return the remaining supplies – but there is nothing more disappointing than watching your project come to life and having to stop mid-way because you underestimated how many items you needed. I spent roughly $70 for this, and ended up using around $40 worth of flowers. This may or may not be within your budget, so you can use your own discretion.
You will need:
– Fake flowers
– Tape
– Scissors
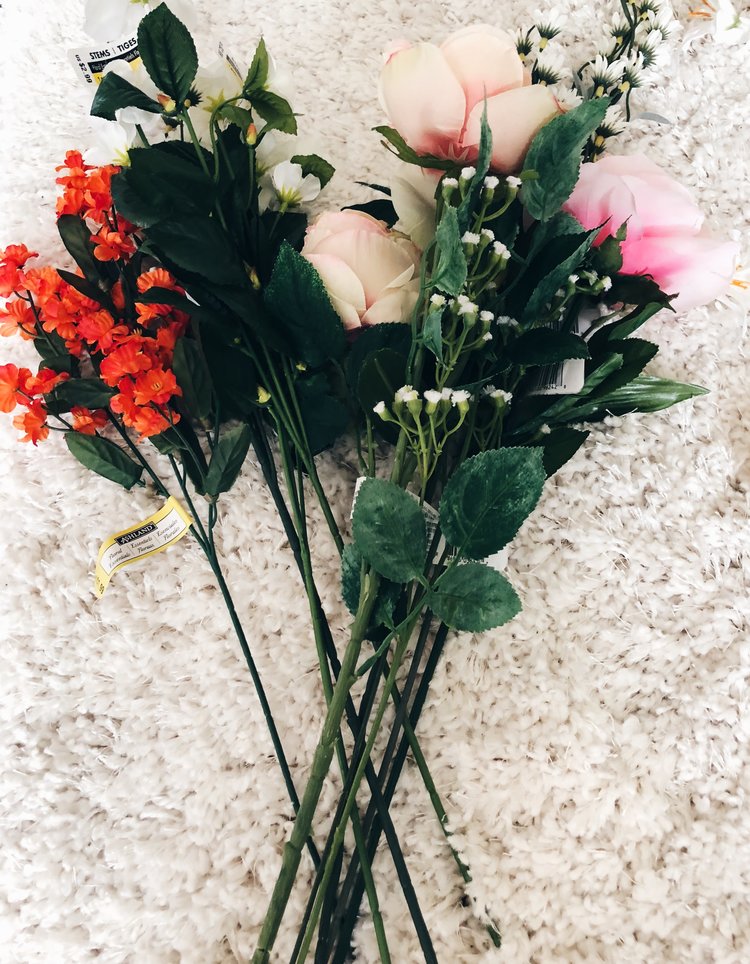
The first step is to pick which flowers you want to use. Based on the UO inspo, I used a warm color scheme, but feel free to do whatever you like.
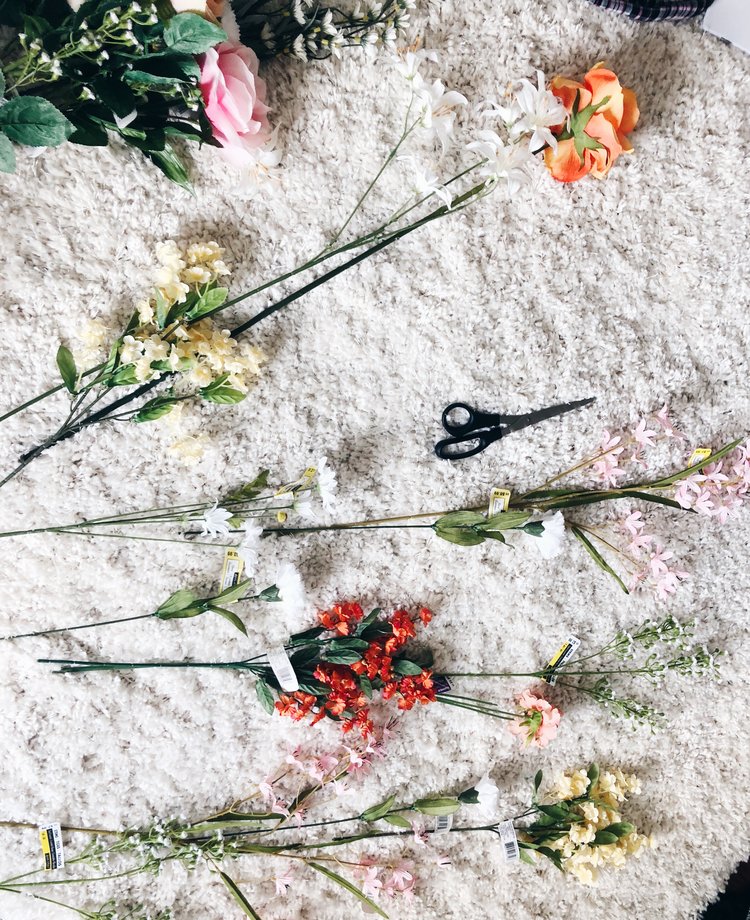
Next, you will want to lay them out and group according to how you want to put them on your wall. I tried not to repeat the same color in one “stalk” and also did my best to keep the colors sporadic across. It took a few mix-and-match attempts for me to settle on my final look.
After this step, you’re going to want to cut off the tags, as well as any extra greenery you do not want on your flowers. I wanted to keep a simple look, so for the most part, I cut off any leaves as well as any buds that were taking away from the big picture. I recommend holding them up in front of the wall, from top to bottom – this gives a better idea on if you should switch the order or trim anything.
Now, you want to start taping the flowers down. I used the first flower in the “stalk” (I’m just going to keep calling it a stalk, because I don’t really know what else to call this flower grouping) to map out where the others would lie below. I taped that one down, and then placed the following flowers accordingly. Keep in mind, this does not have to be perfect – there is no set order or set position. Just make sure to take a step back to make sure nothing looks too out of place from a distance.
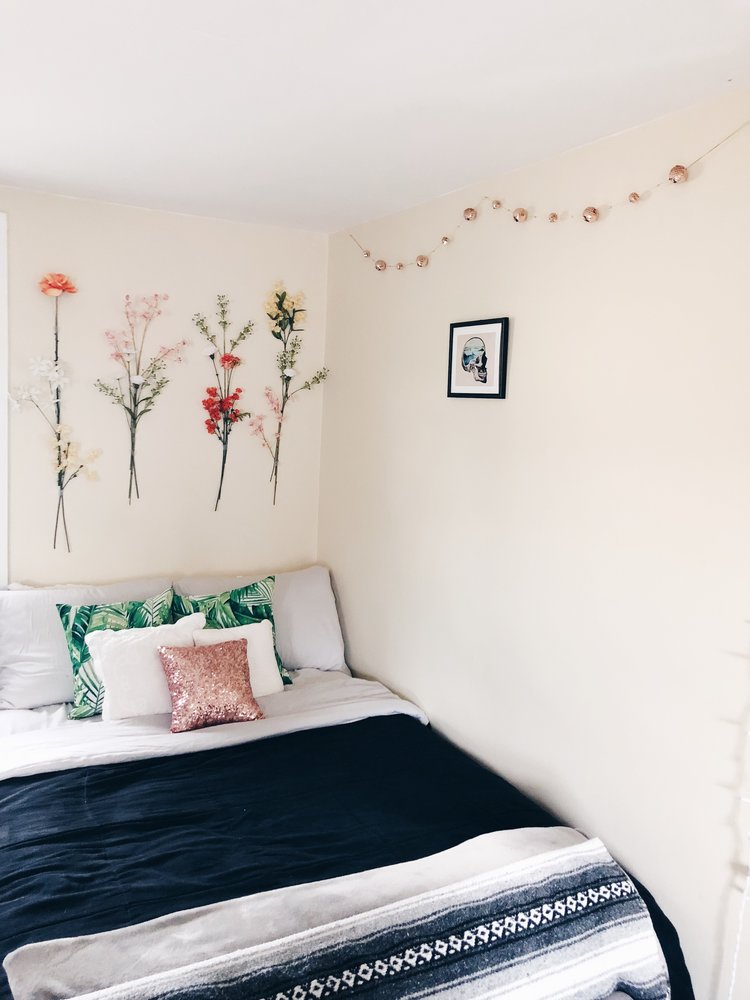
And here you have it! A completed DIY floral wall. Since I don’t have a headboard, I figured the space behind my bed needed something! I ended up rearranging the pink disco balls, because that one wall looked too cluttered now that the flowers are up. Just hoping Sophie doesn’t see these as her new entertainment while I’m at work…
Let me know how it goes for you, and of course, send pictures if you decide to try it out for yourself!
Truly,
Taylor